DIY Spray Booth (or “How I learned to love sheet metal”)
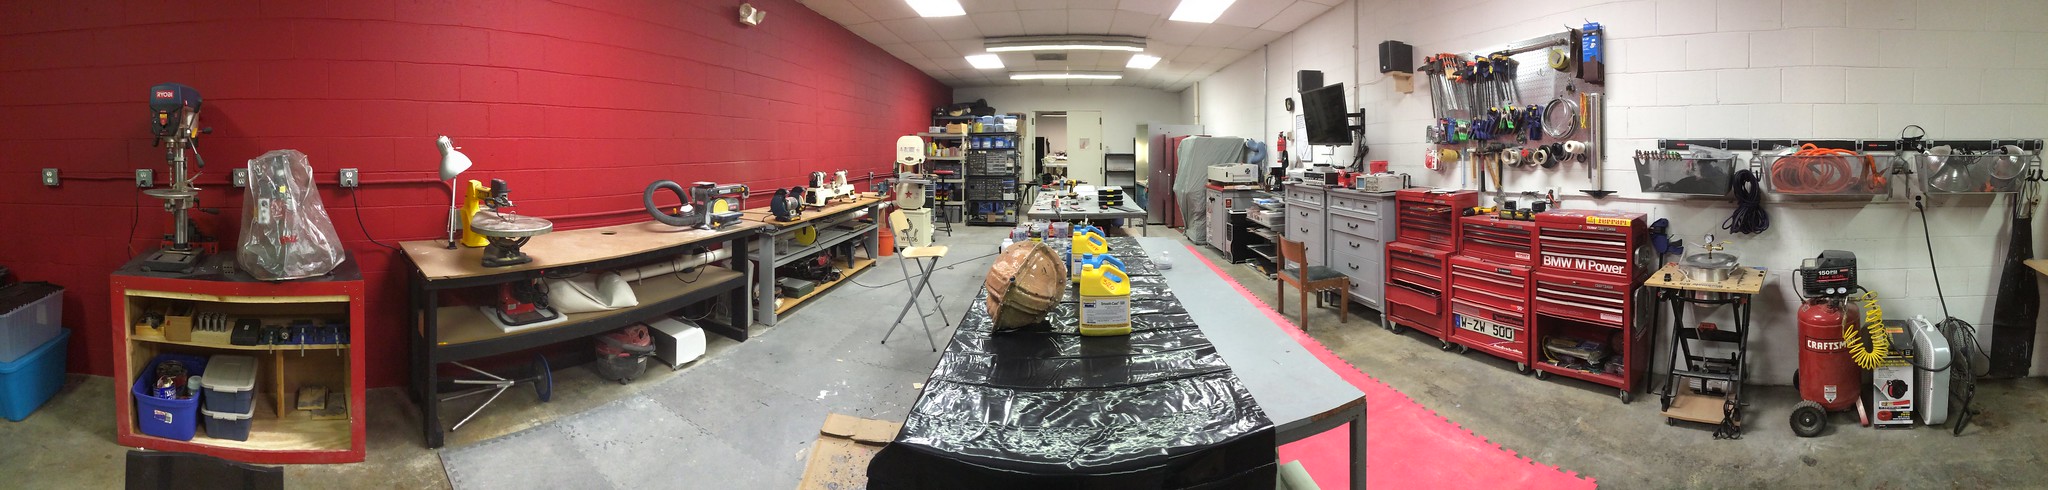
I recently spent the winter months moving into a new workspace. For the entirety of my career building props, I’ve made do in the less-used rooms of my house as well as my garage. This finally reached critical mass around October, and I no longer had the floor space needed for new tools and my expanding business. It took a lot of time and headache, but the new studio is up and running! I’ve moved out of around 540 square feet…

…to a little over 1400! (click on the pics for much higher res versions of these panoramas)
Since I was now in an industrial type space, the possibility of painting indoors with a spray booth was finally an option. Previously I was at the whim of the weather, but with climate control and proper ventilation I could now paint whenever I wanted to.
All I had to do was make a booth that complied with OSHA specifications and wouldn’t bankrupt me. I looked around at pre-fabbed pieces but I felt a bit like Goldilocks (without the breaking and entering) – the booths were either enormous and made for car painting, or tiny and built for 1:10 scale modelmakers. My ideal was something with a 4 foot square opening and about 2 feet of working depth. My initial designs were overly complicated and wouldn’t work with federal safety standards (you can’t make a spray booth out of flammable materials, for one)

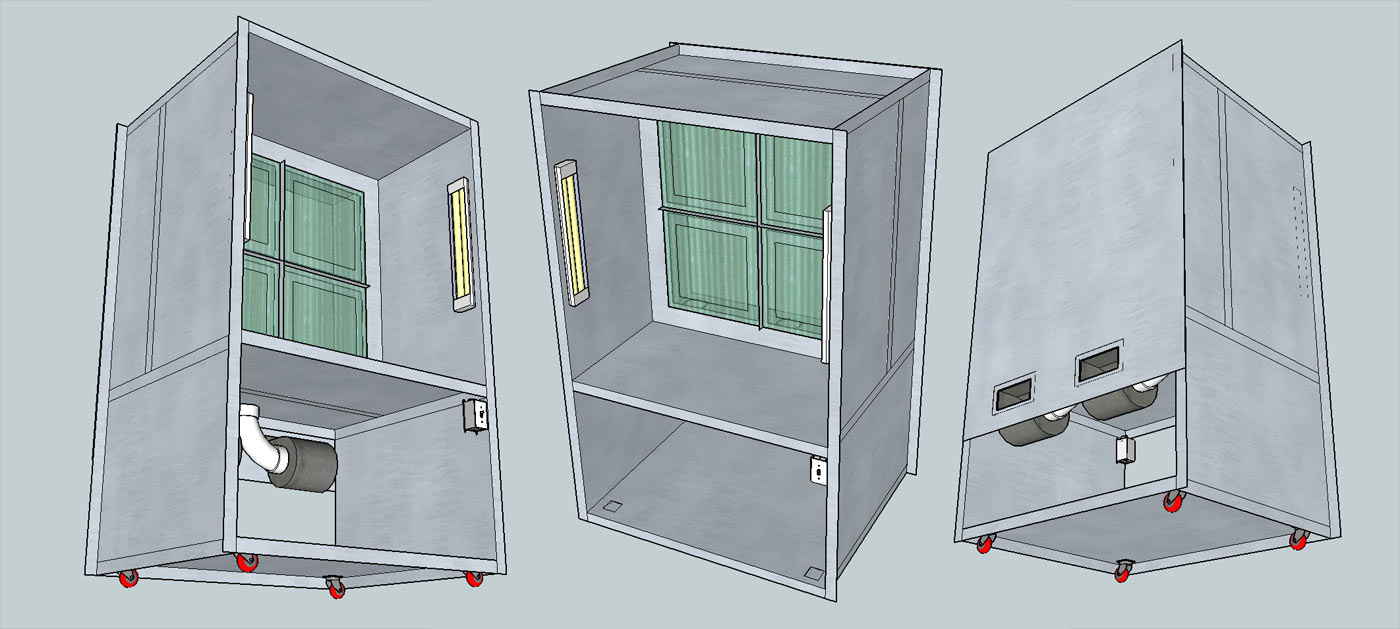
Still, it was a start. I spent a lot of time fiddling in SketchUp and eventually had a design I liked that was streamlined for assembly as well. The entire piece would be built from 18ga galvanized steel. A local duct fabrication company – Dixie Duct – took care of all the metal shaping and cutting, and I was able to pick up finished sheets from them about a week after handing in my plans.

This thing is the largest tool I own now, and the SketchUp plans didn’t really prepare me for the scale of the project. Luckily, my dad came by to help with the assembly! There were 7 sheet metal components (I added an 8th in later) which would be bolted together along a 2″ lip on the perimeter of each part. We started out by framing up the sides and screwing the top panel in place. Clamps held the work table area square while we were drilling holes and adding screws.


At 24″ into the spray area, a baffle plate is mounted to hold the filter frame and filters in place. This looks kind of like a windowframe, and needed to be screwed together from the inside of the unit as it was laying down. We cut 16″ risers from some scrap 1×1 wood and used these to hold the frame at the proper height while it was secured.


I spent quite a bit of time in here. The spraybooth has somewhere around 300 screws that hold everything together and the steel ate through a couple drill bits during construction. Special shout out to my uncle James, who dropped off a couple dozen buckets of hardware at my dad’s shop back in 1998 that finally found a home in this project!


With the filter frame in place, the booth had enough structural rigidity to stand on its own. It was starting to look like something!

The frame that holds the filters in place is constructed from aluminum T-channel. There’s 24 feet of it here cut and riveted together to hold four 20″ x 20″ fiberglass filters. Behind these is a set of mesh filter frames that keep everything in place.

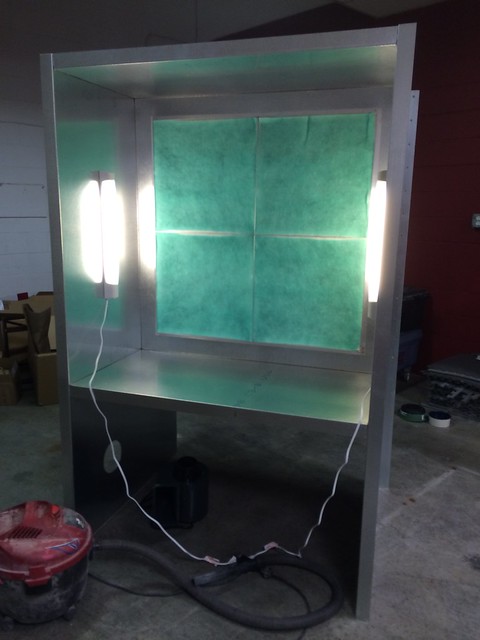
At this point I got antsy and chucked my lights into the booth to see how things were coming. Pretty good!

While the top was decently solid, the lack of a base plate meant moving this behemoth was a bit of a chore. Another order in with Dixie Duct and I had a base plate! I decided to put some casters underneath the skirt of this piece while I was at it, and now pushing the 300lb monster around the shop is a breeze.


Basic framework completed, it was time to add the suction and electrical bits to the project. Wiring is run through several conduit channels to the exhaust fans, lights and switch. A spare piece of conduit was added to the top of the booth to hang parts from while painting.


I found a cool paddle switch on Amazon to use, since I figured I’d be wearing clumsy gloves and such whenever the booth was in operation.

My original design used a somewhat complicated mounting plate for the exhaust fans. When putting things together I realized extending the rear cover plate down another 10″ or so would have been much easier, but this was already completed at that time. The new plans for this booth reflect these changes to make the build a bit simpler. The fans used are spark resistant squirrel cage blowers that move 500cfm a piece.

The exhaust vents for the fans were 8×3″ boxes that needed to feed into 4″ diameter tube. I couldn’t find this adapter for the life of me, so I cobbled up a buck from scrap tooling foam, MDF and PVC, then made a few copies in 1/8″ ABS plastic. I love having a vacuum former!


Here’s the exhaust tubing all set up. Right now this shares a chimney with the laser cutter, but it will have its own dedicated exhaust soon.


My first test run. Works great!

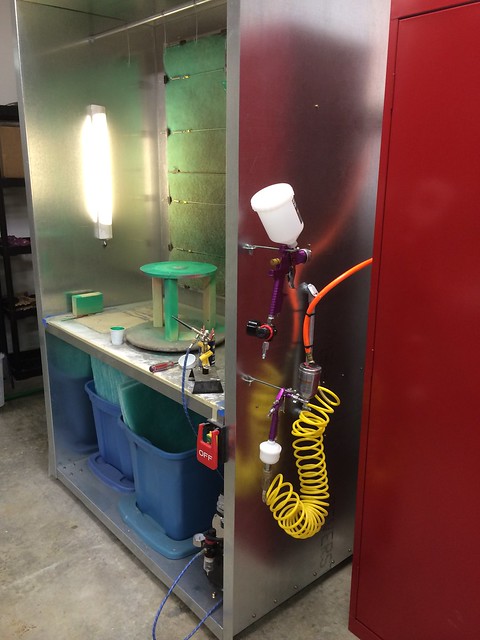
Finished booth. I’ve found out that primer will clog up a set of filters almost immediately, but spraying with my airbrush and HVLP guns is much much cleaner. Horray for indoor climate controlled painting!

If you’re interested at taking a crack at one of these yourself, you can buy my plans and 3D file of the booth in my store. This comes with an assembled and exploded 3D SketchUp file as well as a detailed PDF of the sheetmetal components needed for fabrication.
Thanks for reading!
All of the products listed in this write up are the products that I used and can recommend. Some of them are provided as Amazon affiliate links, which help support Volpin Props.