Hei’s Daggers (Darker than Black)
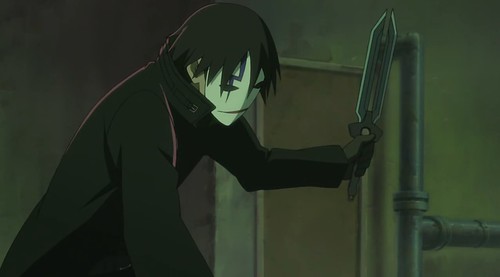 I was commissioned to make 2 replicas of the daggers that Hei uses in the anime series Darker than Black
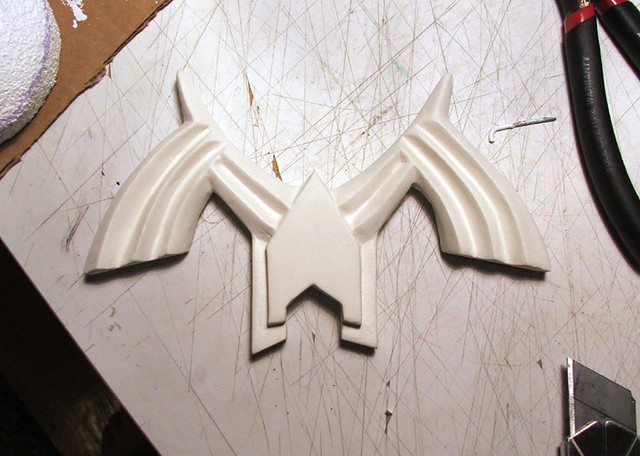
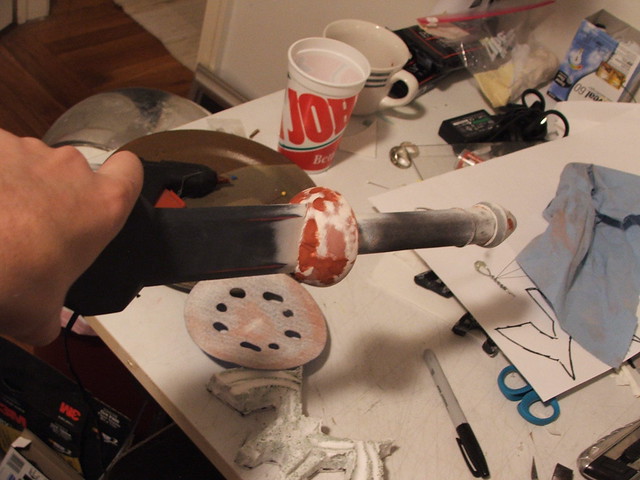
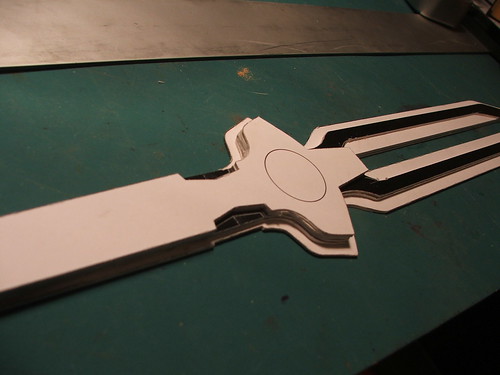 Since I was making 2 of these and they’re symmetrical, I decided to sculpt one half of the blade. This would be molded and cast 4 times in resin, then the resin halves assembled to make 2 complete knives. I started out by cutting the rough shape from illustration board.
 I then skimmed this in apoxie sculpt to give me the beveled edges of the blade and hilt.
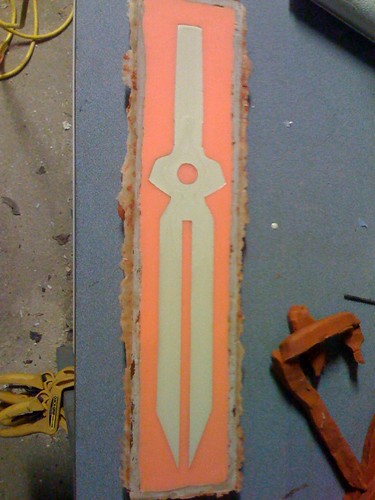
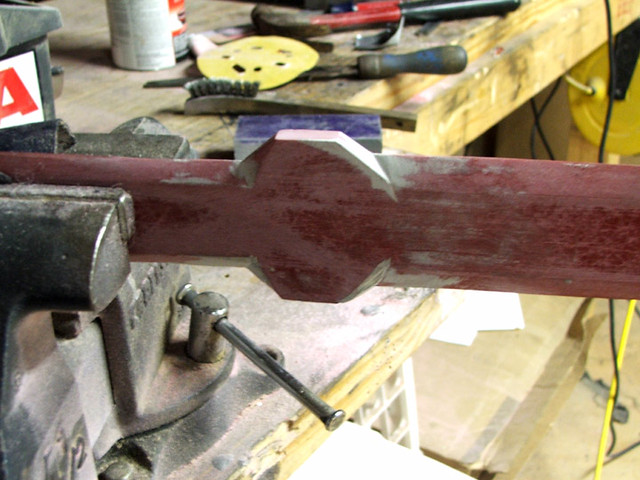
 After bondo, primer and shaping, the finished piece was mounted to a piece of MDF for molding.
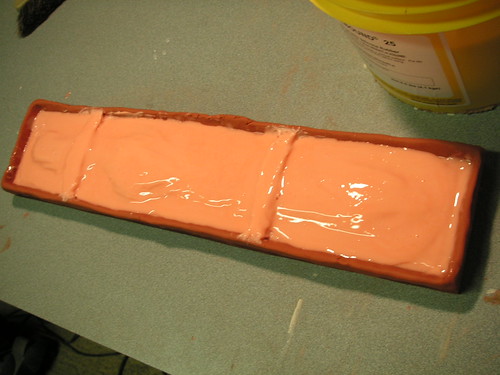
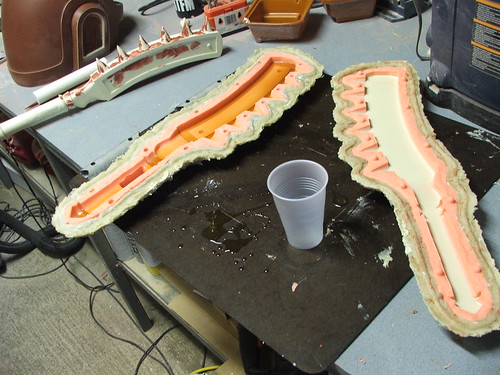
 I used RTV silicone to make the mold, and casting resin for the blades.
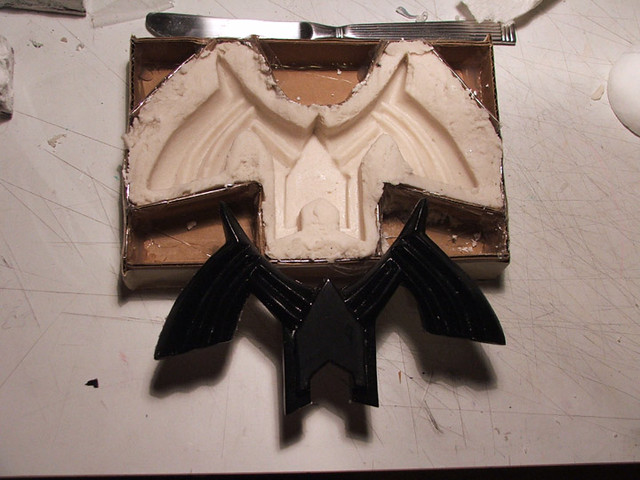
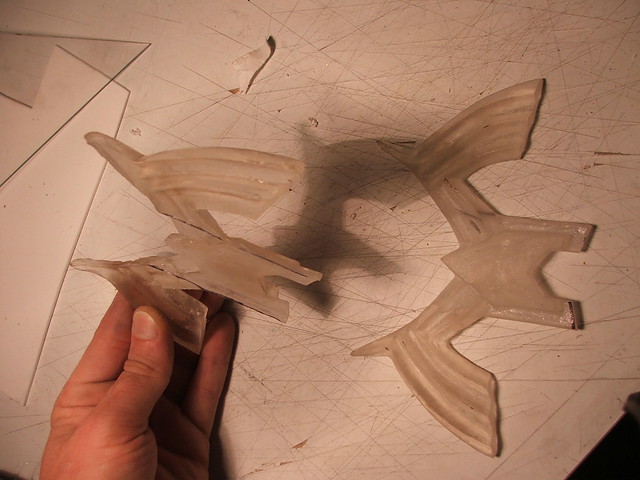
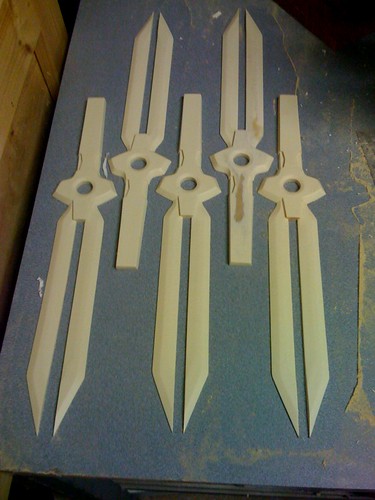 6 copies were pulled in case I made any goofs. The mixture of resin wasn’t right on the upper right blade, so that one was scrapped.
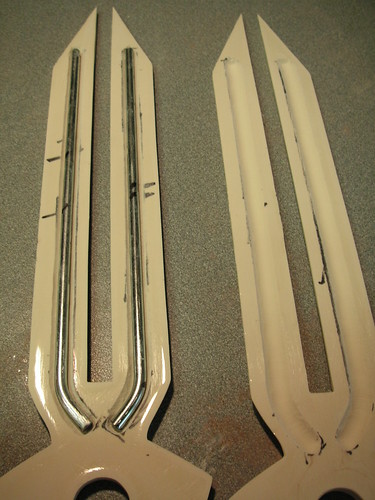 Since the casting resin isn’t terribly rigid on its own, I carved recessed out of the blade and hilt to hold a 3/8″ steel rod to act as the core. These were glued in with gorilla glue, which expands as it dries and will ensure a tight fit.
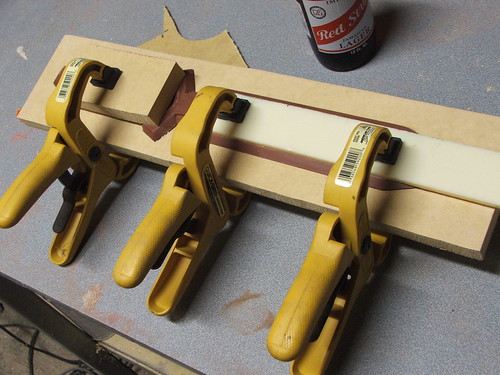
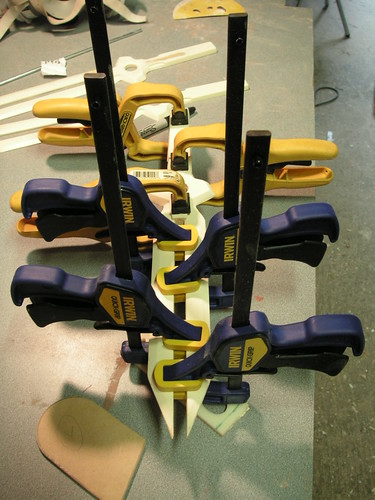 Both blades got ‘da clamps, and dried overnight.
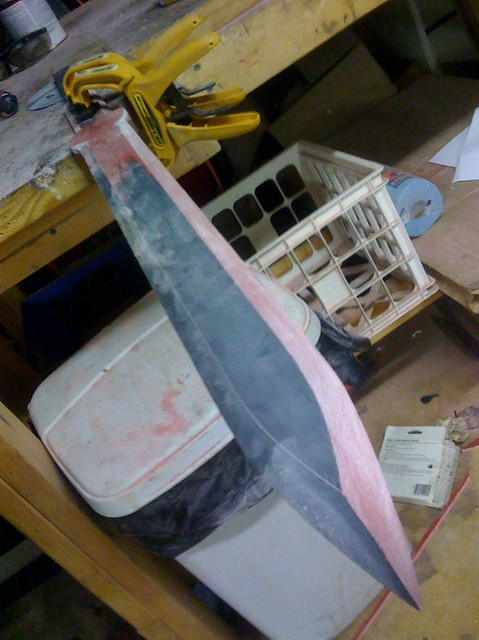
 After that, its time for bondo, primer, and sanding! yippee…..
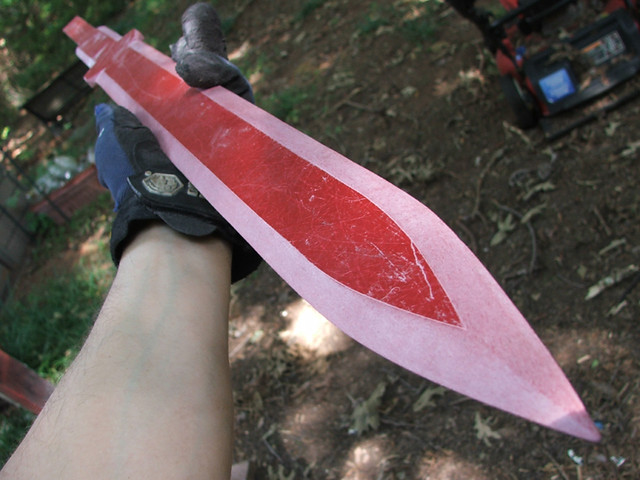
 I originally finished these in a “clean” look, but discussed with my client the option of weathering them to make them appear more realistic. After a bit of hesitation, but it was eventually decided to go ahead with the realistic treatment:
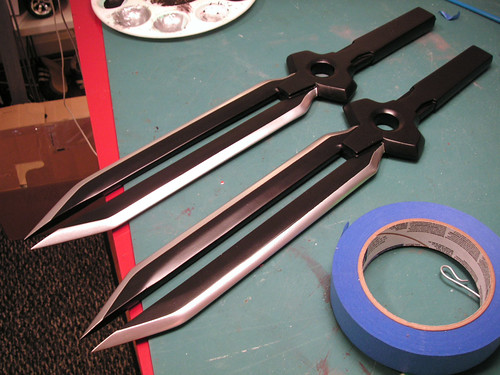
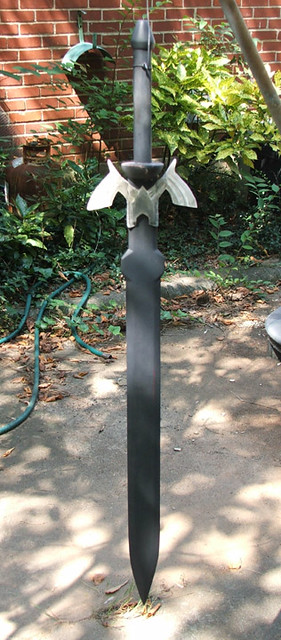
 Here are a couple more shots of the finished blades:


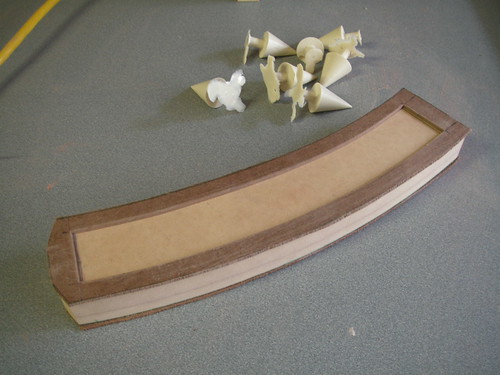
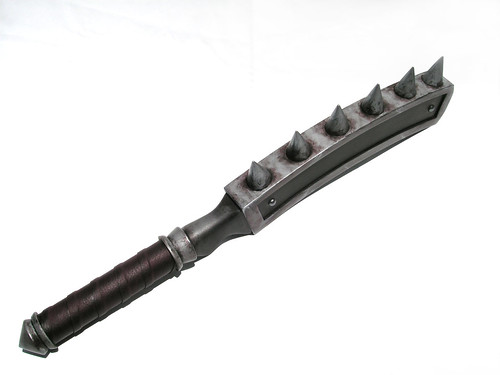
the Kraken Club (Final Fantasy XI)
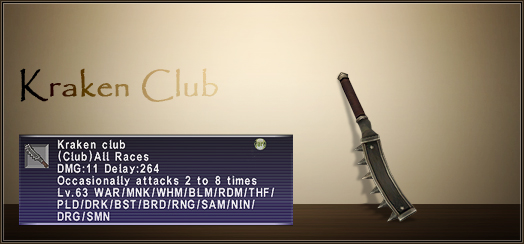
The Kraken Club is a rather imposing club weapon in Final Fantasy XI. They’re most noted for their desirability and very high cost in-game. Also, they look damn cool.

I started by tracing some in-game screenshots into a vector file and cutting the basic shapes from MDF. The club head and neck were pieces of 1/2″ MDF glued together and shaped on a bandsaw.
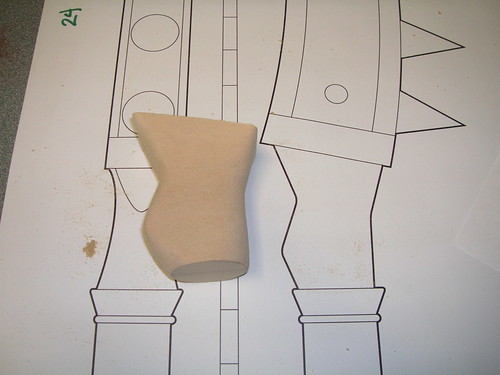
The neckpiece was further shaped using a dremel tool.

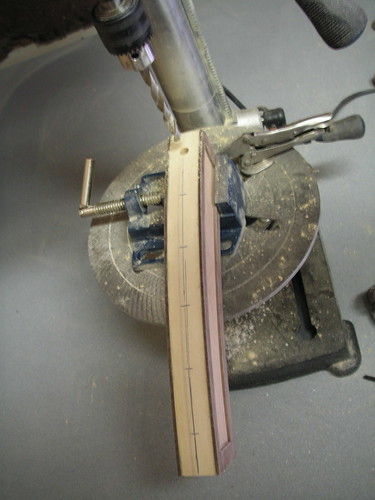
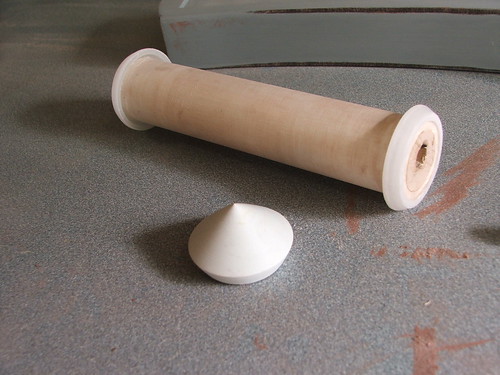
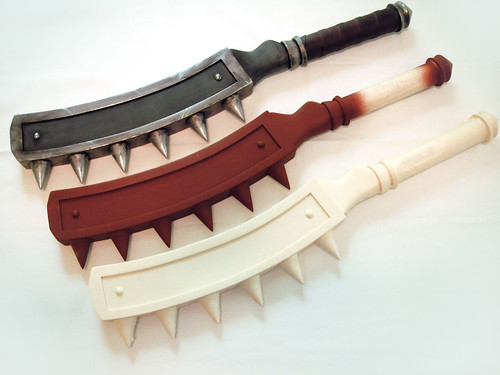
For the spikes, I made a master from MDF and a pine dowel, shaped to a point on a lathe. This was molded with RTV silicone so I could cast the 6 copies in resin. The master is the red primer one in this shot.
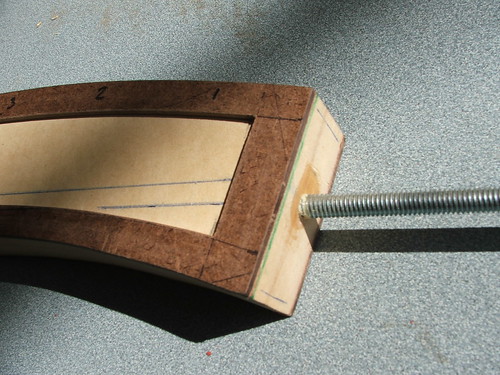
I added the dimensions in the side by cutting out 2 pieces of masonite, which were glued to the club head.
After measuring out the available space, I drilled a series of holes for the spikes to mount to.
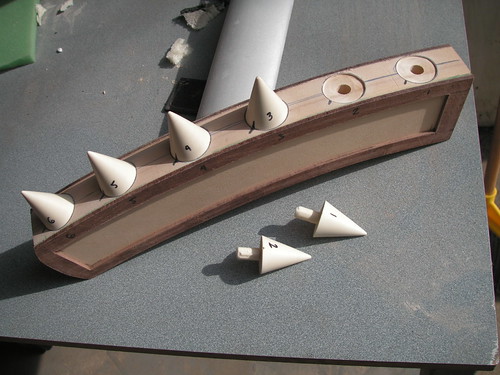
These were then recessed so that the flat bottoms of the spikes would sit flush with the curves surface of the club face.
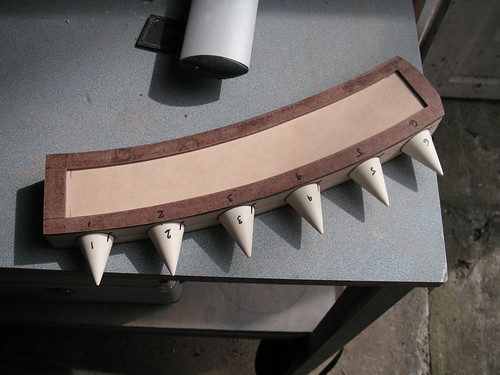
Each spike was numbered and a hatch mark made on the club head so that alignment would be perfect. Though they are cast reproductions, each one has slight variations which made them fit better on different parts of the club. This is impossible to see in the final product, but made a large difference in assembly.

A quick test with a PVC handle to see how things are coming along
A 3/8″ threaded rod was embedded 12″ into the club head and secured with gorilla glue to act as the “spine” of the piece.

I turned detail pieces for the neck and pommel from MDF wood and Apoxie Sculpt. The handle is PVC pipe with a pine dowel inserted in the center for rigidity. All of these pieces were put over the threaded rod and secured with more gorilla glue and a 3/8″ nut at the end.
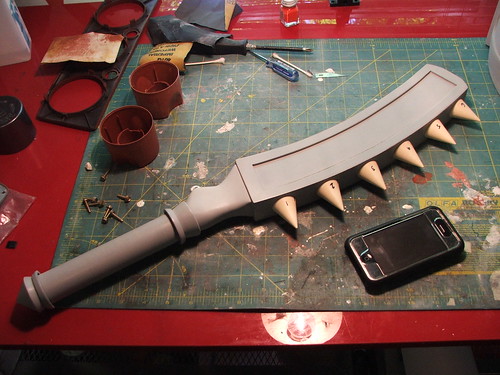

The final assembly before another primer coat and steel wool buffing. iPhone shown for size reference.
Since I have plans for making multiples, I decided to mold the entire piece. In retrospect, it would have been easier (and a more economical use of resin) to make separate “head” and “pommel” molds and join them together with another steel rod, but this method works just as well. The original was molded in RTV silicone with a Plasti-Paste II outer mother mold. I get all my moldmaking stuff from Smooth-on.com and they have excellent shipping speed and the best prices of anyplace I’ve found.
Duplicates are poured one side at a time to reduce bubbles in the final cast. After they’ve half-cured, the mold is assembled and joined with more resin.
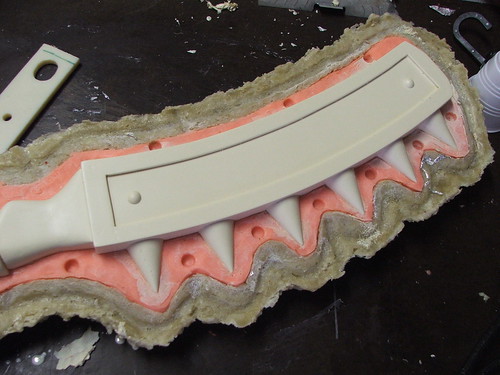
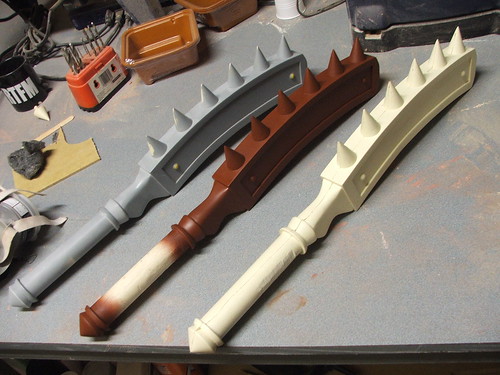
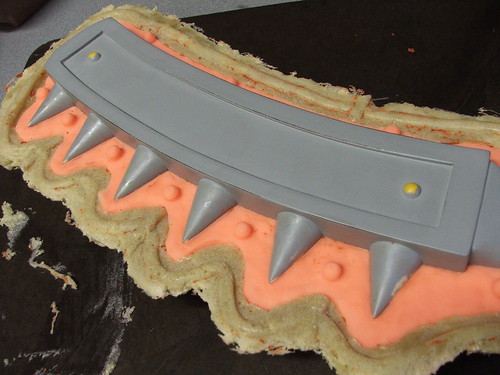
A cured piece before being pulled. This mold turned out pretty good with only minor cleanup needed to make the finished resin pieces paintable. The master and 2 duplicates are shown above. The red one in primer has been cleaned up of all flashing and the minor imperfections have been filled with spot putty.
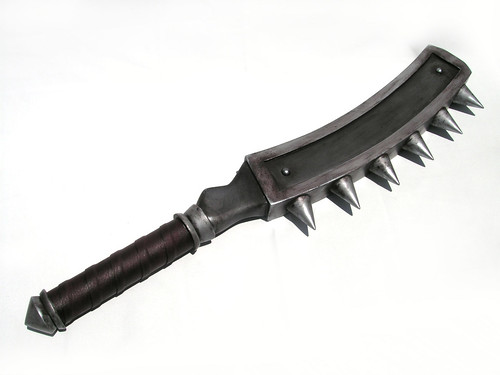
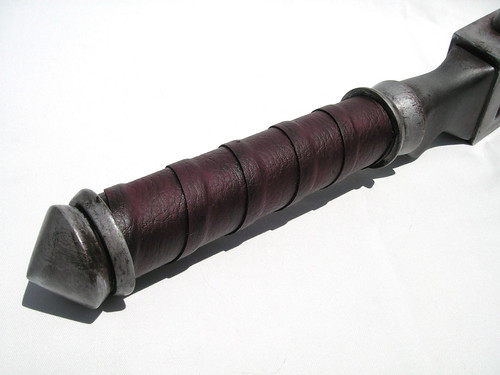

The master was painted with chrome spraypaint, covered in matte clearcoat. This makes for a nice “steel” look. Darker areas were tinted with flat black primer, then the whole piece was weathered with acrylic paints. I found a deep burgundy vinyl that matches the screenshots I’ve seen perfectly. This was wrapped around the handle and also weathered with acrylic.
The finished piece is 24.5″ long and weighs about 8.5lbs. The resin copies are actually a little bit heavier.

Destructoid.com “Mr. Destructoid” helmet
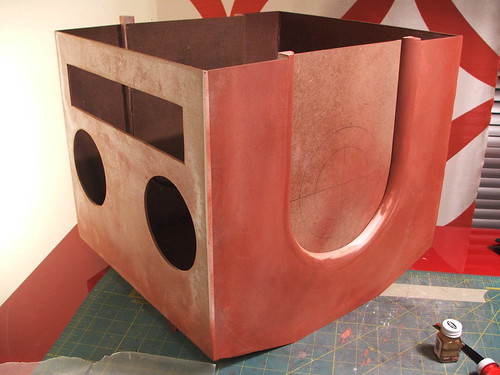
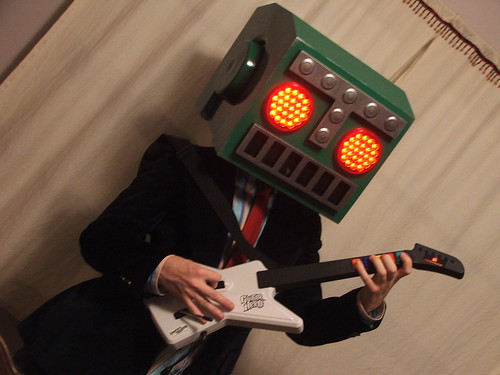
Yanier (Niero), the founder of Destructoid.com, commissioned me to replicate his mascot “Mr. Destructoid” for their website’s three-year anniversary.
Their original mascot had served faithfully for years, but Yanier wanted an upgrade. My design direction was “Chibi, but like a Transformer” Fun times!


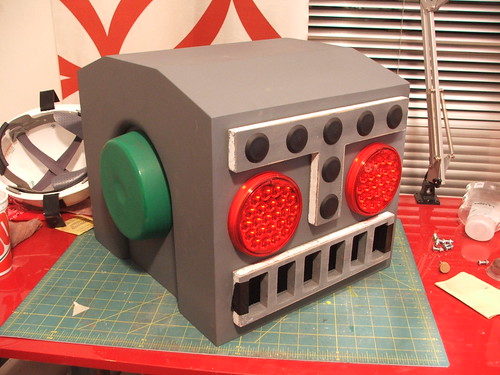
After deciding on dimensions and schematics, I transferred my design from printouts to masonite, and trimmed the necessary pieces. These were tacked in place for mockup, then hotglued to hold thier shape temporarily.
The seams were filled on the outside with Apoxie Sculpt to make everything have sharp 90 degree angles.
Niero was looking for some illumination, and I found a set of LED lights that fit the dimensions of the helmet perfectly. I wired them to have a “high” and “low” setting. They’re very bright when on “high.” The whole system is powered by my favorite, a 9V battery.
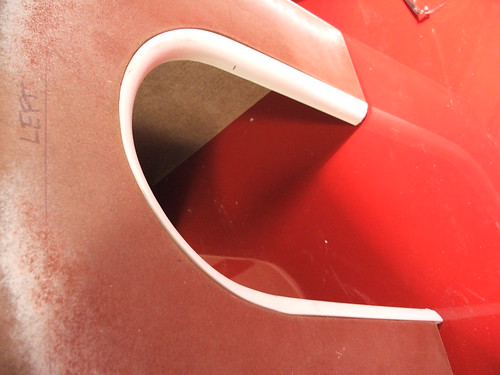
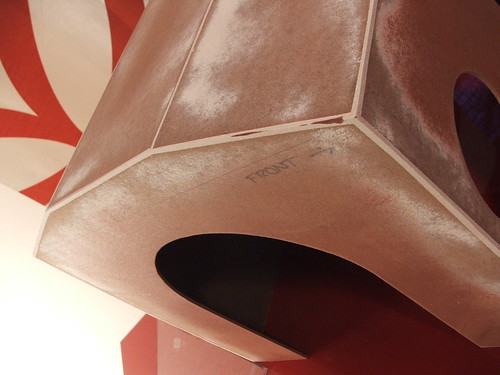
I molded some extruded plastic edging into the C-shaped cut outs around the ears to taper the outer shape into the ear recesses. These were temporarily hotglued in place…
…and then masonite backing plates were added as well.

Of course, hotglue isn’t very sturdy or reliable. I reinforced the entire inside of the helmet with fiberglass mat and resin, adding some apoxie sculpt in the corners to give them extra rigidity. The C-shaped ear cutouts also recieved fiberglass treatment.

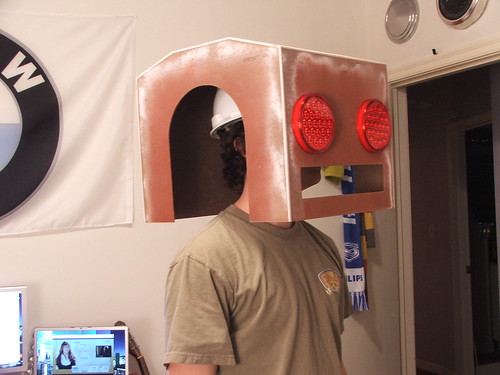
At this point I decided on a helmet rigging system. The hardhat has a ratcheting system in it so that the helmet can be worn by different people. I also added a chinstrap to it after Neiro told me he was planning on running a 5k jog (!!!) with the giant thing on his head.


Paint buckets were used for the ear “pucks.” The bottom of the buckets were cut out, and a masonite disc was epoxied to the open edge.
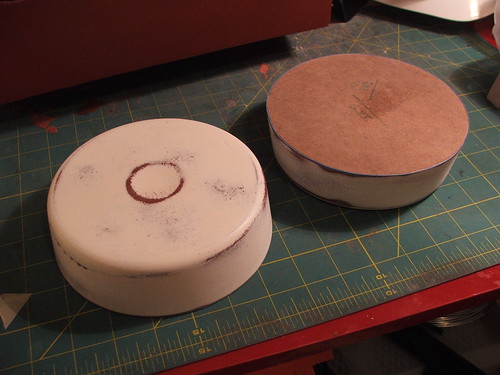
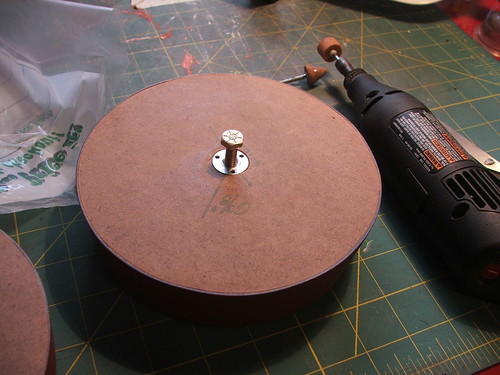
After mucho sanding, the pucks were drilled for a blind nut that was epoxied in place. An aligned hole was drilled in the helmet, as well as a “locking tap” which keeps the ears from spinning around on their bolt.

A fellow SCAD graduate ran the rivited “eyebrows” and mouth through a cool autorouter he has. I’m really looking to see what his machine can do, and this was a good simple pattern to test out. 343’s website (dude who did the carving) is here: http://sevencubed.net/
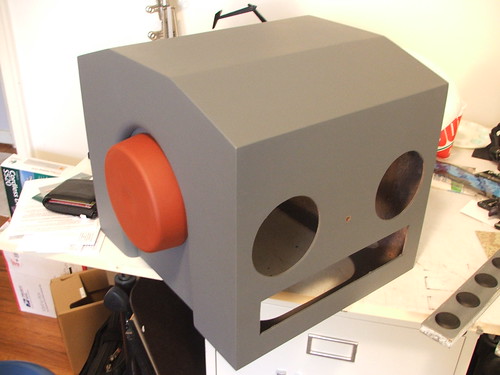
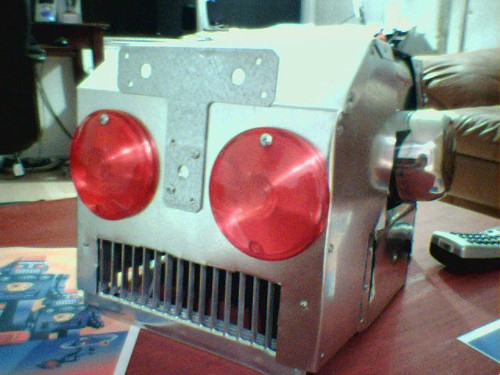
After lots of sanding, I had my first test assembly with all the components! One ear puck would NOT co-operate, and I ended up having to paint it in between the snow when it was about 20 degrees outside. Laying a gloss coat in weather like that sucks.
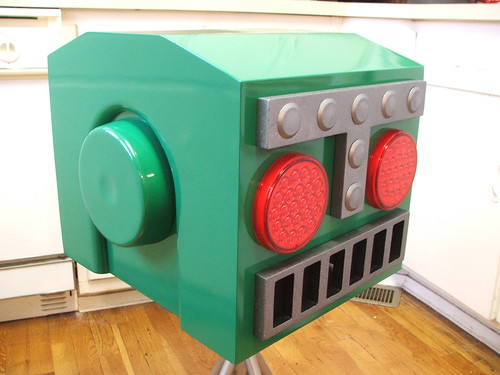
It all paid off though! But this looks far too new… too shiny…

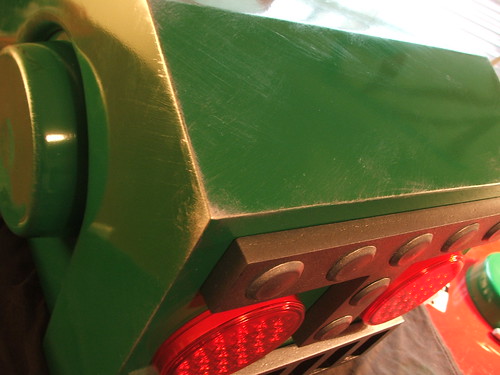
A little drybrush weathering to give the effect of a “used robot” was employed. This really set off the corners of the piece and pulled the whole look together.

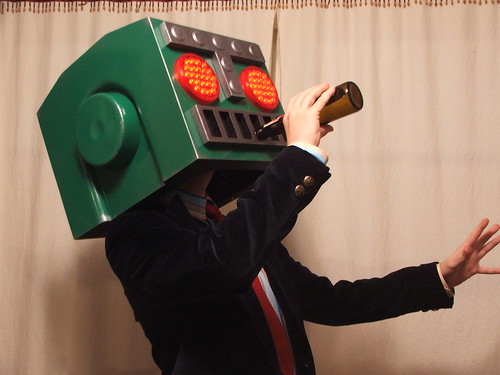
I added some mesh behind the mouthpiece as well, to keep other people looking in from being able to view the wearer as well as if they’re completely open. The inside edges were also painted black for this reason. It really doesn’t inhibit viewing out when you’re wearing it though.
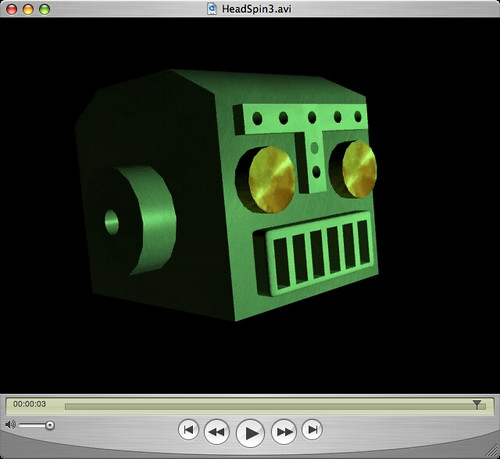
The guys at Destructoid.com did a really cool teaser video for the debut, which you can check out here:
Happy Third Anniversary, Destructoid.com!
[Edit]: To answer some quick questions I’ve been hearing on the Destructoid.com forums;
- The helmet weighs about 8 pounds. Some very quick google searching says the average human head weighs 11 pounds, so its kind of like wearing another head.
- The positioning of the viewing port in the mouth makes it so that if you’re ever talking to anyone of the fairer sex, all you can see is their cleavage. I tested this on my fiancé. Its awesome.
- I chose not to line the inside of the helmet with any sound-deadening material for 2 reasons. 1) it weighs enough as it is, and 2) one of the main complaints I heard about the old helmet was how hot it got inside. I figured insulation wouldn’t help much. The “echoey” thing isn’t really that bothersome; you do have your head in a box, after all.
- I tried to make things as light as possible, while also remaining budget-conscious. I could have made the whole thing, then made a silicon mold and resin-cast the whole helmet, which would have saved me about 3 or 4 pounds. This would have quadrupled the build cost, however.
- It is huge. Thank you for noticing.
- Per client request, I will not be producing duplicates without the expressed permission of Yanier.

Bioshock Little Sister ADAM Syringe
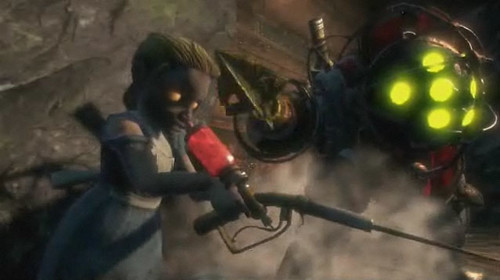
The Little Sisters from Bioshock are among the creepiest characters I’ve ever seen in a videogame. Their syringes, used for extracting ADAM are even moreso, with vials of genetic material in a glass that the sisters suck from dead bodies, then drink. ugh.
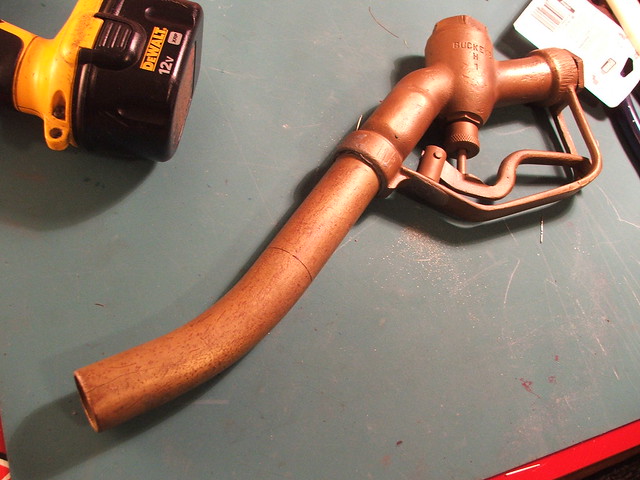
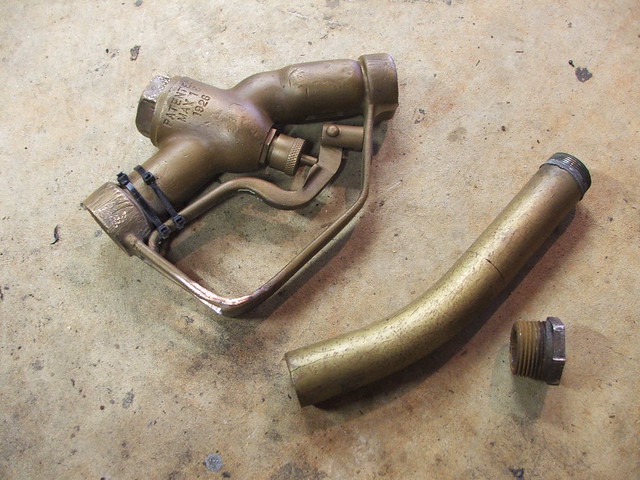
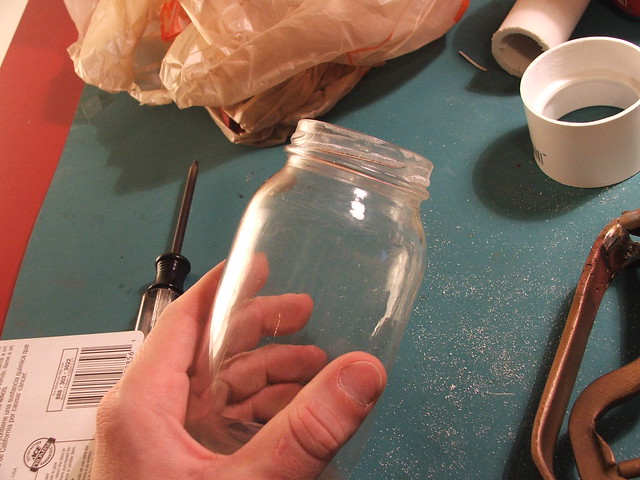
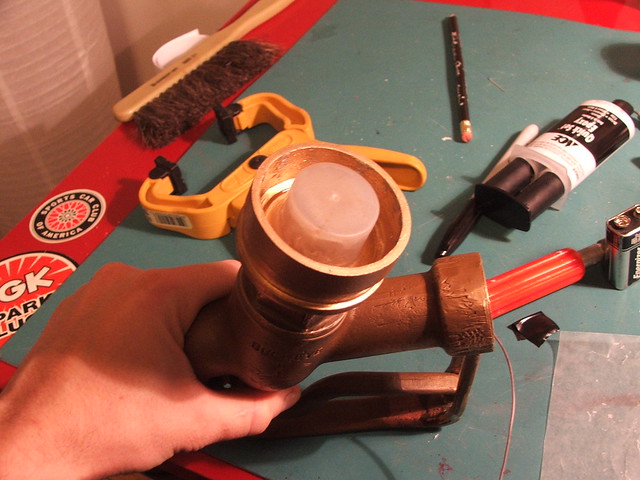
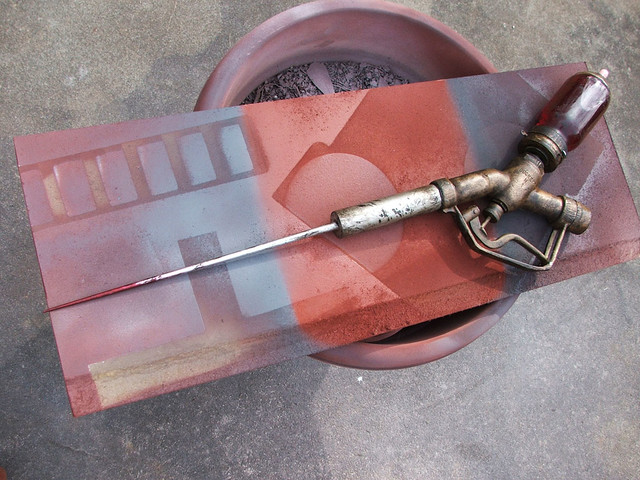
I have to compliment the designers at 2K Games, their research on this project was top-notch. The Syringes themselves are built out of mid 20’s-era brass gasoline pumps, the needles/bottles/etc being added by either the Sisters themselves or some other crafty person. I went looking and found this one, casting stamp date 1926. After breaking it apart, I needed to add the barrel/syringe combo, the bottle, and an endcap.

I found an old glass bottle in a friend’s basement that was the perfect shape and size. After filing down the threads on the end, I fitted a PVC coupler to its open end, shaving down the inside for a tight fit.
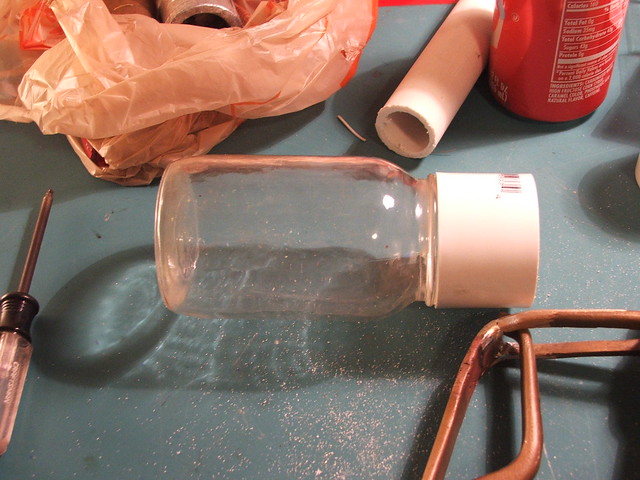
Raised edges were added to the pipe fitting with apoxie sculpt to mimic the attachment point on the game syringe, and the end was capped off with ABS and more apoxie sculpt. This was then sanded flat.
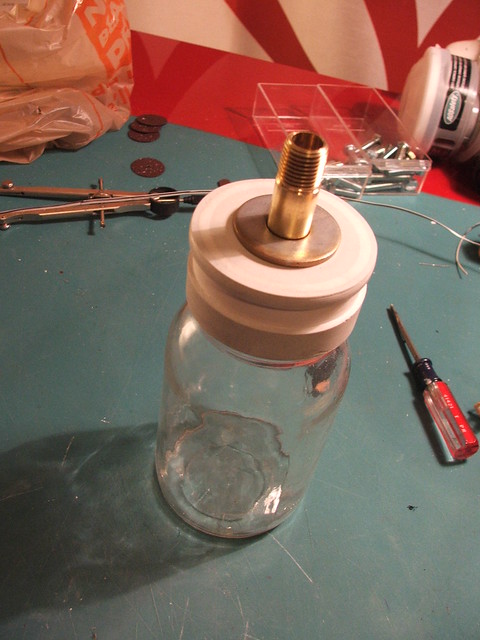
I threaded the apoxie sculpt and inserted a brass fitting to mate with the upper plug on the nozzle. A few washers were added for texture. This piece was epoxied in place.
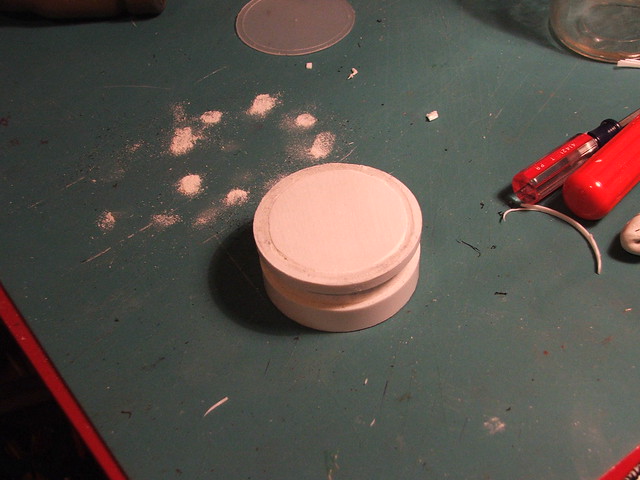
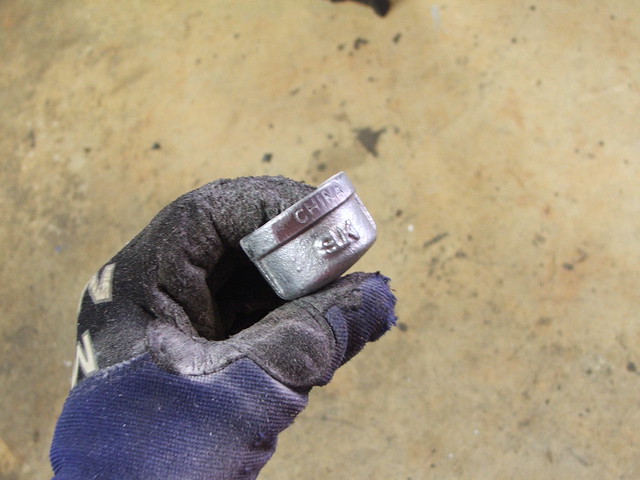
The endcap started life as a piece of steel pipe from a hardware store. I had to grind off the ugly casting marks of the manufacturer and “CHINA” which were in the metal. Leaving them there would have been hideous.
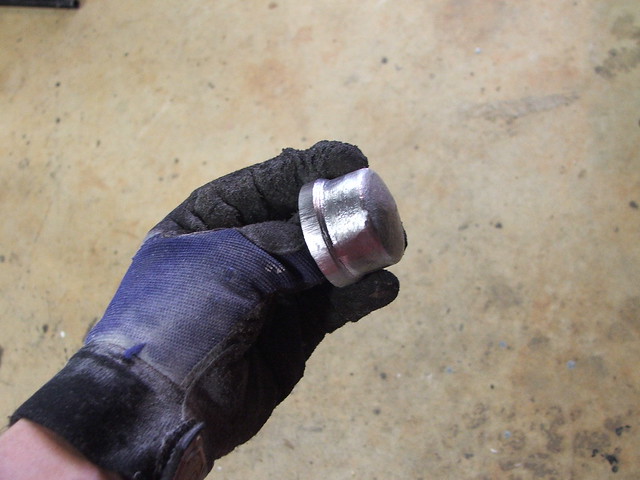
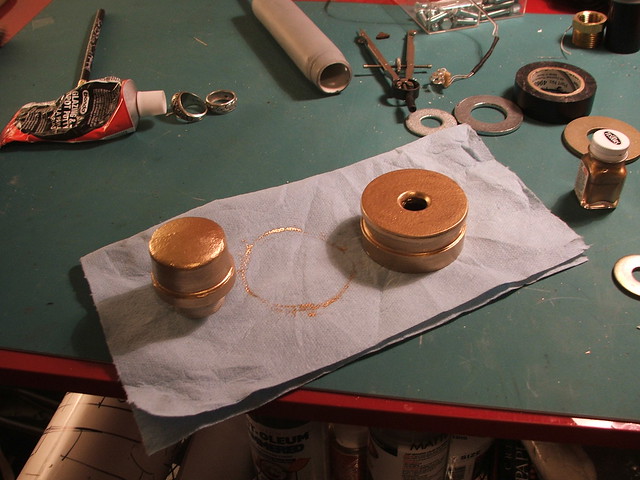
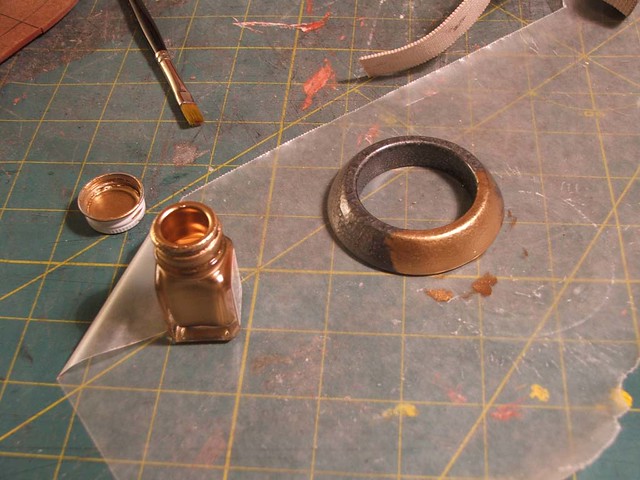
The endcap and bottle coupler were painted with silver krylon “hammered” texture paint, then coated with Testors gold to match the body of the nozzle.
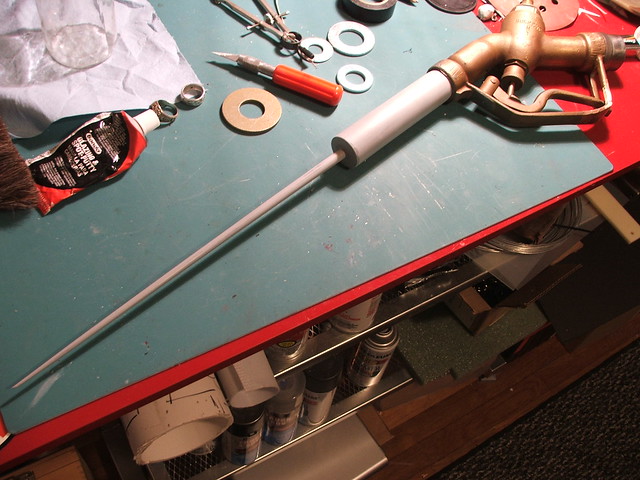
An early test fit of the pieces shows the 1″ PVC I used to make the “barrel” of the syringe. The end was plugged with apoxie sculpt and sanded flat. This was then drilled out to recieve…

…a 3/8″ pine dowel which I lathed down to a point. The end is chamfered like a real syringe would be, although one this size is a little disturbing. Its alarmingly sharp.
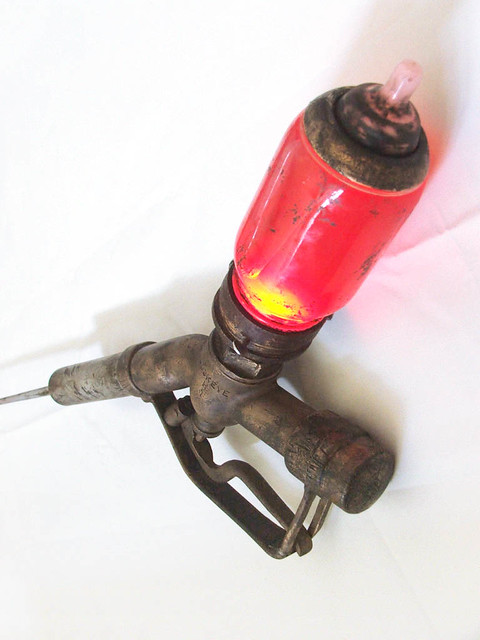
I drilled and tapped the upper plug on the nozzle to accept the brass fitting from before, then secured it in place with JB weld. I needed a hollow piece to run the wiring through for the LED bank which will live in the ADAM chamber and illuminate the red goo from inside.

The bottle coupler was added, and a frosted clear cap was placed over the LEDs to diffuse the glow. This was filled with epoxy to seal any leaks from the bottle above.
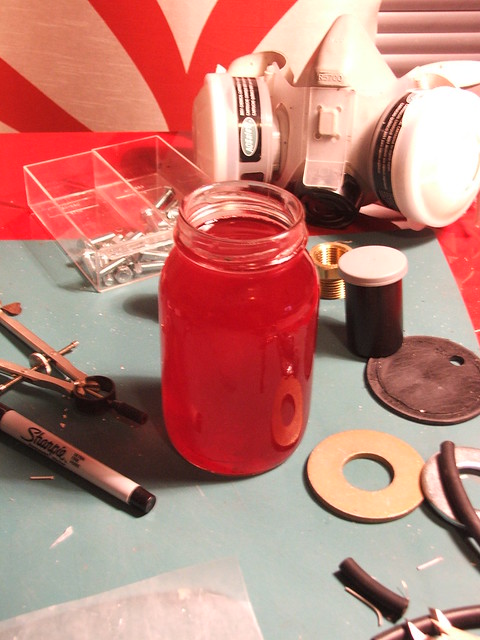
The “ADAM” is actually RIT dye, clear hairgel and water. I had hoped the hairgel would increase the viscosity of the solution, but it seems like the chemicals in the dye dilute it somewhat. The liquid inside is about the color and consistency of red gatorade… which makes me wonder why I didn’t just use that.
First assembly and test-fire. The needle part has been painted with dull aluminum.

Weathering this project was fun. Just beat into the finish with anything you have available, make it as random as possible, then fill the resulting scars with layers of black and brown acrylic paint. I think from now on I’m only going to do “heavily weathered” props… The finish is just so much more fun than sanding with 2,000 grit paper! The endcap was weathered with a hacksaw and dremel, to match the scars that already existed in the nozzle when I got it. It looks like someone stuck a huge pipewrench on it several times in it’s life.

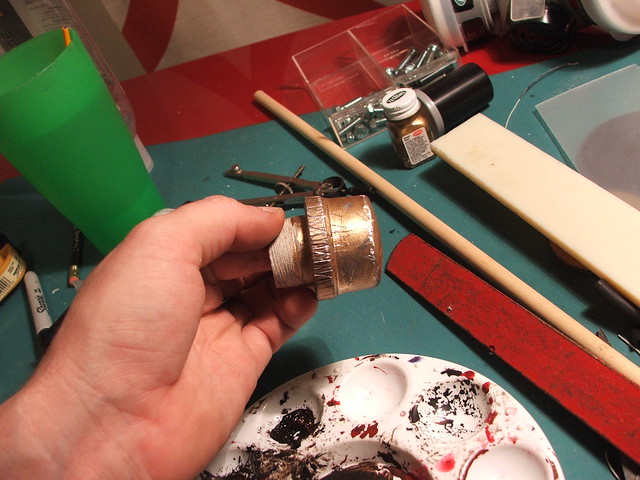
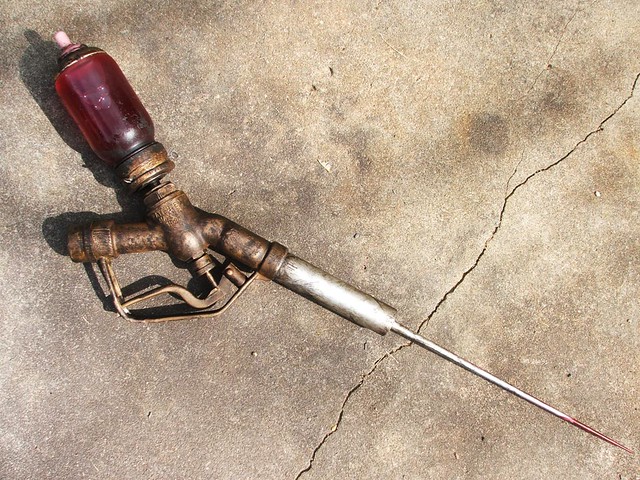
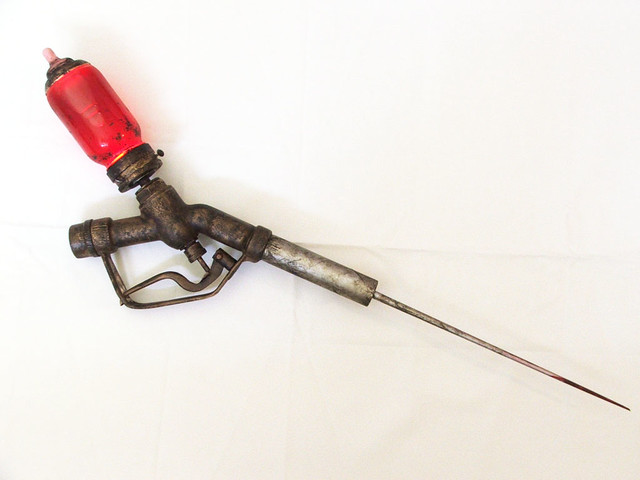
A key thing missing in almost all of the syringes I’ve seen so far is the baby bottle nipple end on the ADAM chamber. You can watch the Little Sisters drink from it in the trailers… gross. The ring was made from apoxie sculpt and PVC, and the clear nipple painted pink from the inside. It recieved the same weathering treatment as the rest of the syringe.

Once the whole thing was assembled, I sprayed it with a few coats of matte finish clearcoat, to make sure none of the weathering “grime” wore off. You can see in the above shot the blood-soaked end of the needle. Smaller but still there are the three thumbscrews I added that sit on the upper ring of the bottle coupler. This was hard to make out in the game stills, but the extra dimension there adds a bit of “cobbled together” feeling to the piece.
The final replica, outside in natural light, and a few shots indoors to show the illumination.


Portal Gun
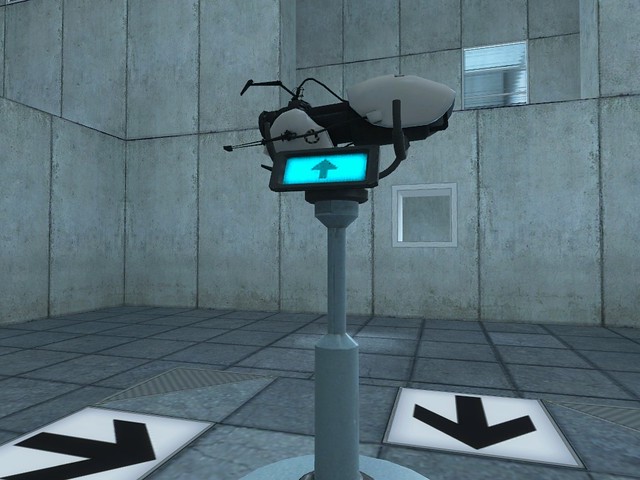
So, one day I decided to make a Portal gun. It turns out the internet really likes Portal, and also really likes my gun.
UPDATE: I have a new entry for a rebuild of this project, which goes into more detail. Click HERE for that write up!
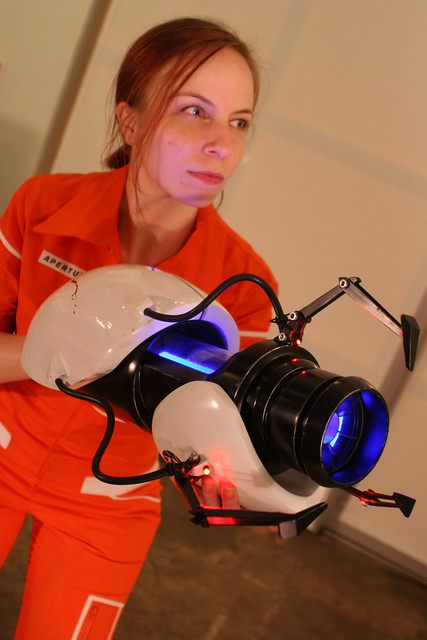
I made this for my girlfriend Emily, who will be cosplaying as an Aperture Science test subject at DragonCon 2009. I have been approached by many people about making duplicates, and I will be making 5 more.
EDIT: These have ALL been claimed, and I will not be producing any more than 5.
Truthfully, a LOT of people want these things, and as much as I could just make a never ending string of portal guns, it would diminish the uniqueness of the piece. It would be a stretch to call my work art, but it is a very accurate replica, and keeping the production numbers low will make the existing models even more rare and unique to their owners. The final gun, #5, will be auctioned off to the public upon its completion. Gun #2 may also be available for auction, but this will depend on whether or not the charity organization I’ve offered it to gets back to me or not. The reason these are being auctioned is to make sure that anyone who wants a shot at getting one has that opportunity
The 5 replicas will be finished in early October, as I have a lot of other commissions ahead of them right now. When guns #2 and #5 go up for sale, I will be posting a blog entry as well as a link to their auctions.
For anyone that’s curious about how I did it, follow along:
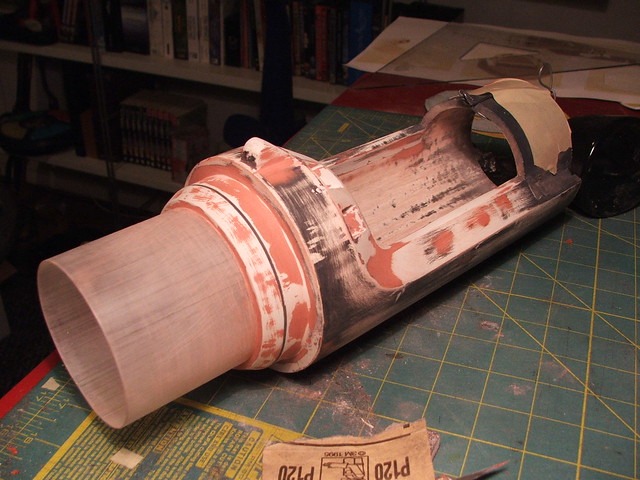
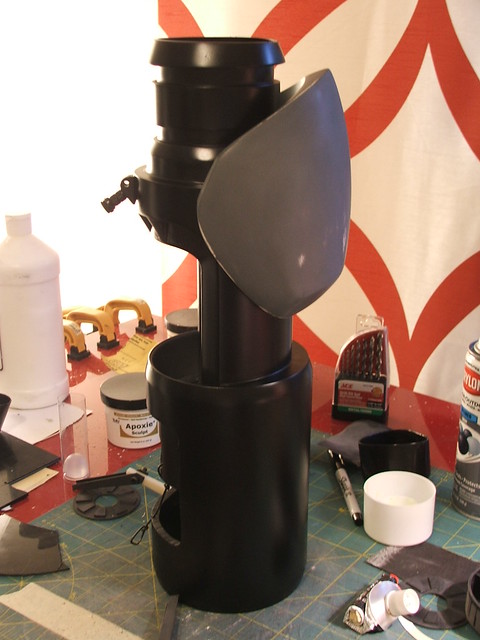
I started with 3″ and 4″ sizes of PVC pipe and cut them into the shape of the black “barrel” of the gun. Both pieces got U-shaped cut outs on the top and were epoxied together. The gaps were filled in with apoxie sculpt and sanded to shape. After some bondo work and a lot of sanding, I had this:

This gives a better idea of the shape of the cuts, this is after another guide coat and a small application of bondo to fix some other smoothing issues:

And sanded down from the above stage:

The center chamber was made out of a mail-order lexan tube and an acrylic plunger handle. The black discs are cut from ABS and have more ABS plastic wedges epoxied onto them to give the texture you see inside the gun chamber:

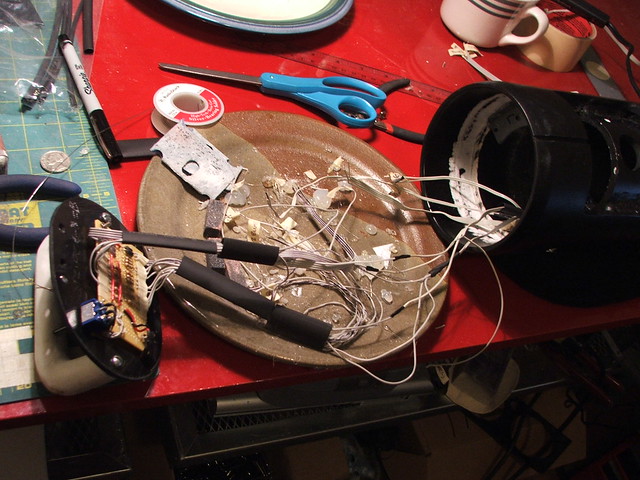
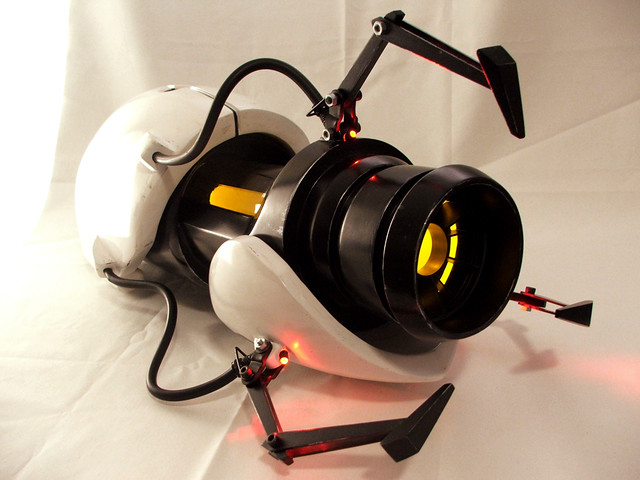
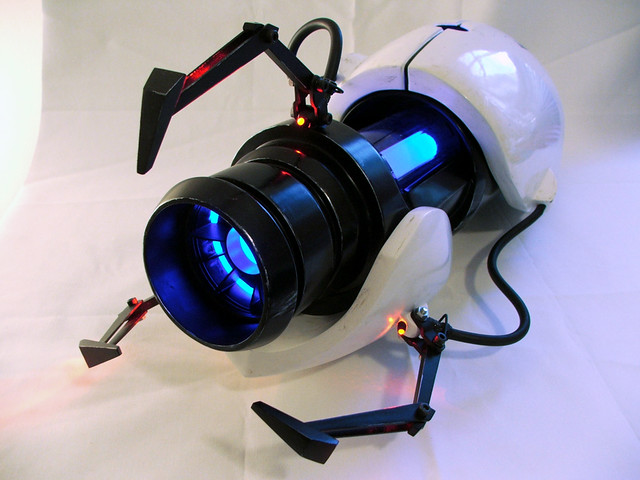
The circuitry was a little annoying. I wanted the gun to light up blue and orange, as well as have red prongs as shown in-game. 27 LEDs or so later, toss in few resistors and diodes, and a 3-position switch, and voila:

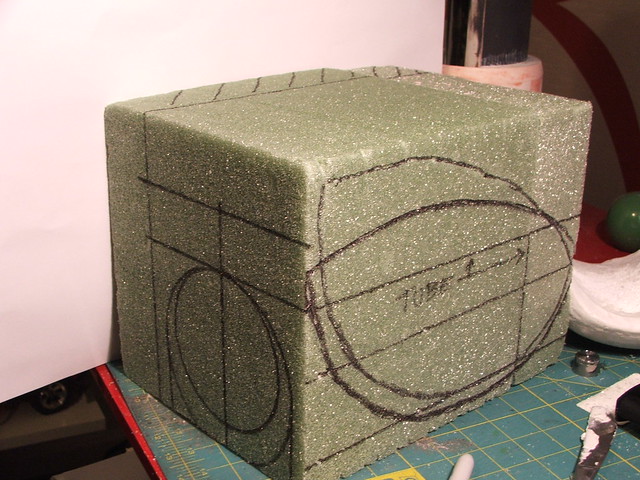
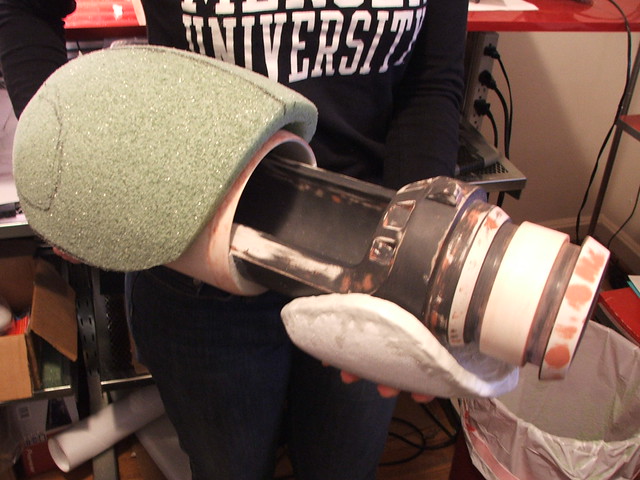
The white casings were the next hurdle to tackle. I had intended to make them out of carved pink insulation foam, but had some issues with solvents and melting of the foam… which goes to show you NEVER trust an online tutorial on something until you try it for yourself. In the end I sculpted these out of green dry florist’s foam as more a matter of a time crunch than anything else. Seems to have worked out in my favor though:
I also added 2 sections of 4″ PVC couplings to the back of the barrel to act as the larger rear portion. These were epoxied to one another and the seam filled with bondo:

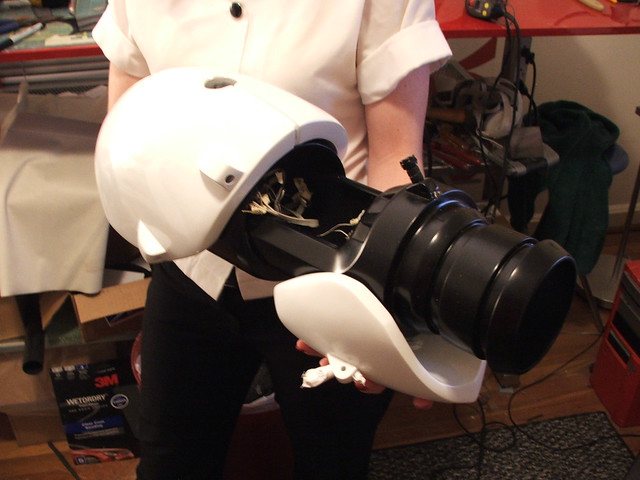
Scale test (Emily is 5′ tall even) The foam was covered in Wonderflex plastic, and the edges lined with apoxie sculpt for definition. You can see this in the front casing below
After this, the casings were painted with several layers of high-build primer to hide the texture of the wondeflex, and the gun was guide-coated, wet-sanded, and top-coated.

The claws were made out of ABS plastic, PVC for the thicker base pieces, and carved apoxie sculpt for the triangular ends. Here they are on a test-fit

The front casing was wired for red LEDs and top-coated in gloss white paint. Each coat was wet-sanded with 2000 grit paper before a gloss clearcoat.

Another test assembly
Once I had final fitment sorted out, I connected all the appropriate leads to the circuitboard
First “test-fire”

A necessary detail was the “Aperture Science” side logos and barcode. I used water-slide decals with clear backing for this. The files were created in Photoshop and printed onto water-slide decal paper on a laser printer

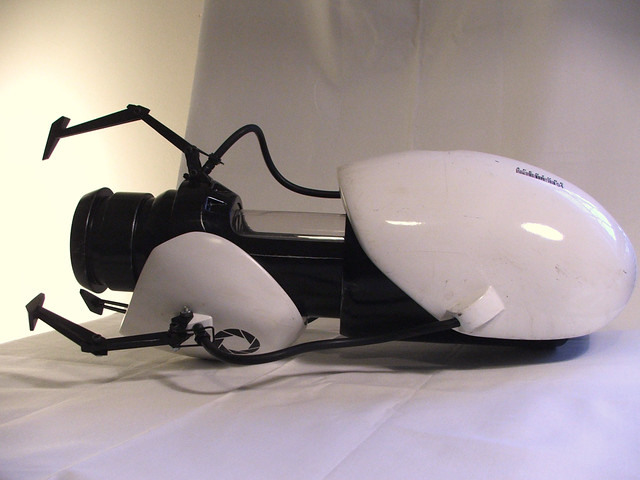
Finished product!
The final touch was some light weathering, and a blood spatter from an errant turret round. Anyone thats played Portal knows you are bound to get tagged by one of those things eventually!
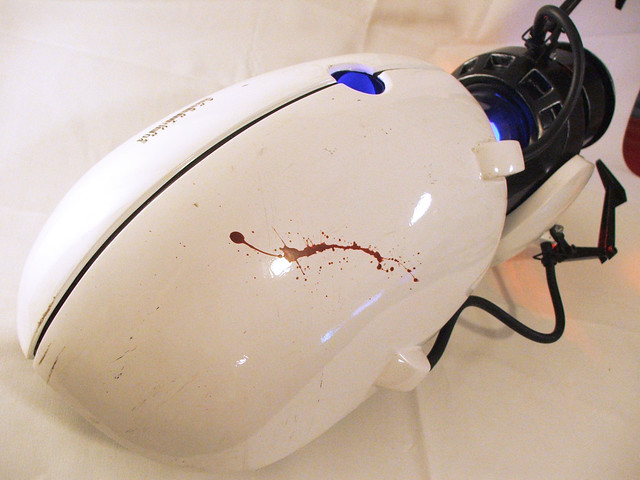
Finished shots, and one of the gun in action!


Link’s Master Sword

I had planned on going to a convention here in Atlanta in September, but didn’t really think of the fact that most conventions don’t really like you huffing around a steel sword. Unfortunately, the one I used for my Link costume was steel, and I had 8 days until the convention to figure out what to do.
I started with a 38″ sheet of 3″ x 3/8″ fiberglass and scribed the blade pattern onto it

After cutting along the shape with a jigsaw, I used an orbital sander to refine the edges and sculpt the blade
The hexagonal details near the hilt required some bondo and filing to make sharp and smooth
After a guide coat and some more sanding, the blade was near finished!
I sculpted the hilt from paperclay. The plan was to make a mold of this and cast the two halves in resin. Unfortunately, I didn’t have access to any of my usual materials, so I had to make due with some unfortunate substitutes. The paperclay took forever to dry, shrank in size considerably, and was generally a bad material to use for a mold.
The castings turned out alright, but needed a lot of work to bring up to par.
Two pieces of MDF were affixed to the handle and rounded over. The handguard was sculpted out of apoxie sculpt, as well as the pommel. both were epoxied to the fiberglass on the blade. This is after some bondo cleanup work.
Hilt attached, and primed
After considerable cleanup, the whole blade was coated in perhaps the crappiest silver paint I have ever used. It may look pretty, but to this day the stuff isn’t completely dry…
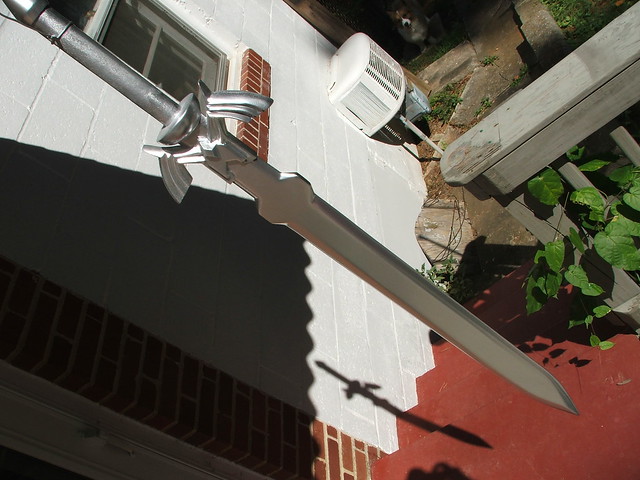
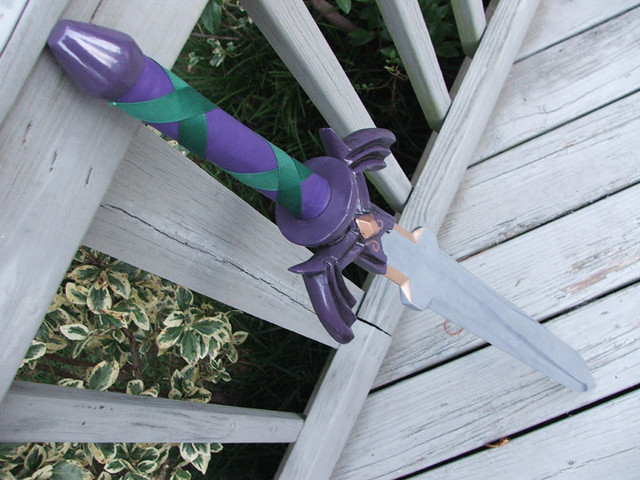
The hilt and pommel were then painted with Testor’s Enamel
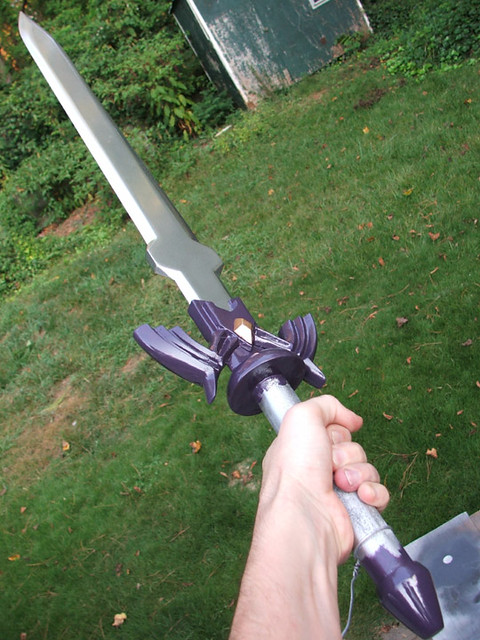
Finally, the handle was wrapped in purple vinyl and stitched around the handle. The green ribbon is a bit too wide, but with hours to go before I needed to get to the con, I just went with it.
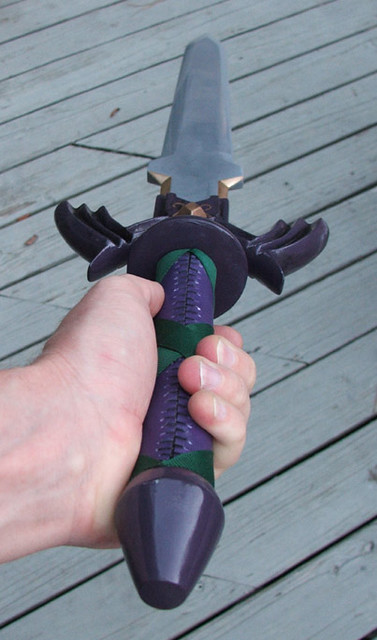
And a finished shot. This piece is currrently in teardown, awaiting some much-needed revisions.

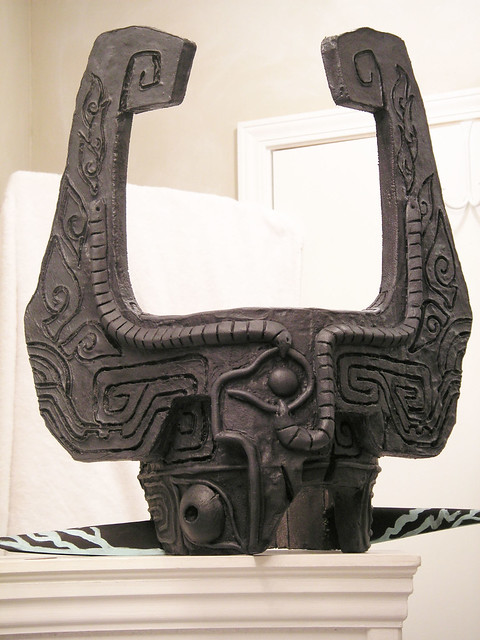
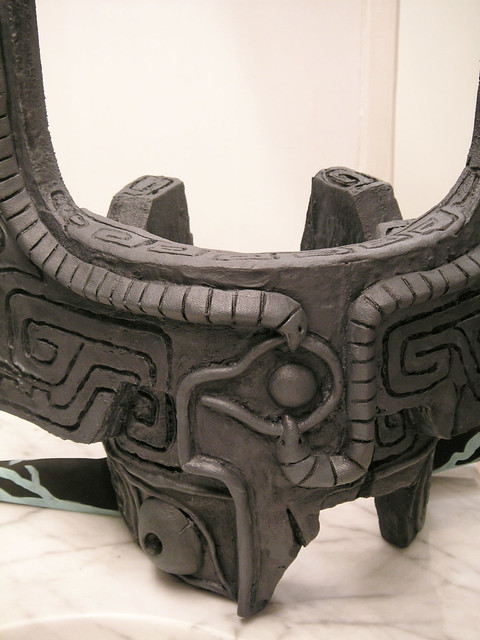
Midna’s Helm
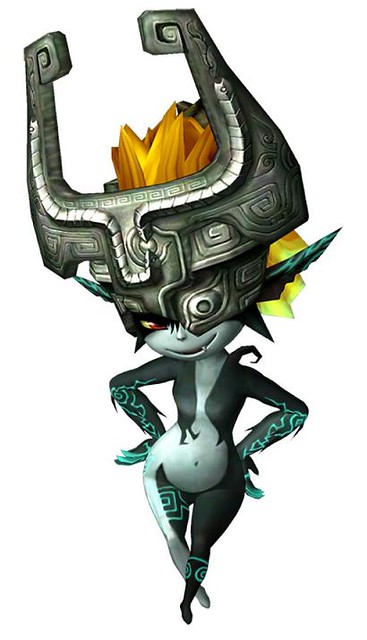
Midna is an interesting character. You don’t want to like her, but as the game progresses, you can’t help but find yourself drawn to the little imp. Her helm is a particularly interesting piece of sculpture, one of four pieces of the “Fused Shadow” that you’re sent to collect in the beginning stages of Zelda: Twilight Princess.
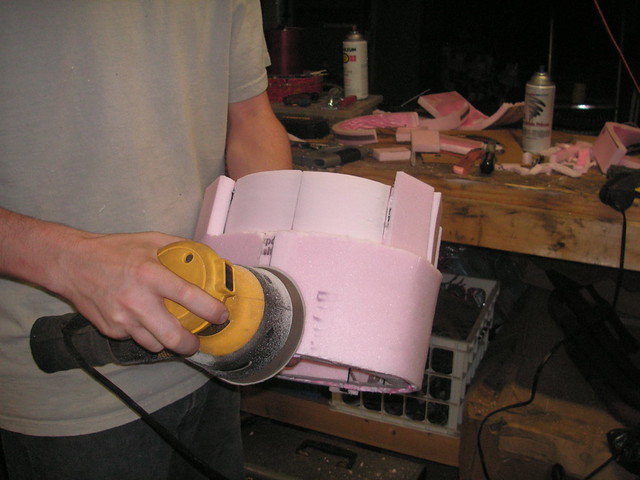
Since this is a helmet, it had to be light enough to not fatigue the wearer if used for 4+ hours. I decided on making it out of insulation foam. The initial parts were angled pieces of foam that were made to fit around the client’s head. After that, I heated 2 pieces and bent them around the circumference of the piece, forming a flat surface to work with.
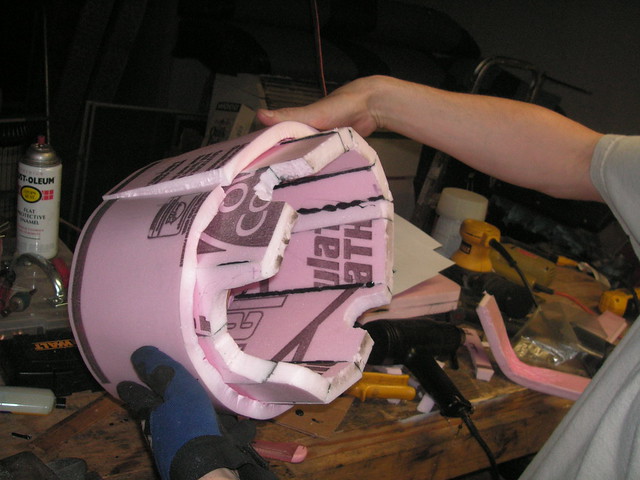
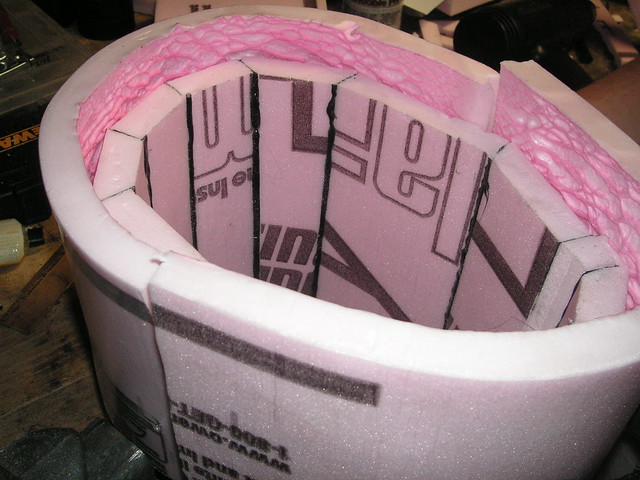
The “horns” were flat pieces of foam, glued to this structure. A raised edge was built up between them to form the front of the helmet. Recessed runes and patterns were carved into the foam using a soldering iron, while the raised portions were made using hot glue.
Unfortunately, there are only three process photos of this project that exist, as I was in a time crunch and the entire thing needed to be produced in four days. Despite the rush job, I believe the finished product came out very well. Other materials used were Crayola Model Magic (I will never use this again,) expanding insulation foam, ABS glue, and several different types of paint. The helm comes in weighing just over 3 pounds.


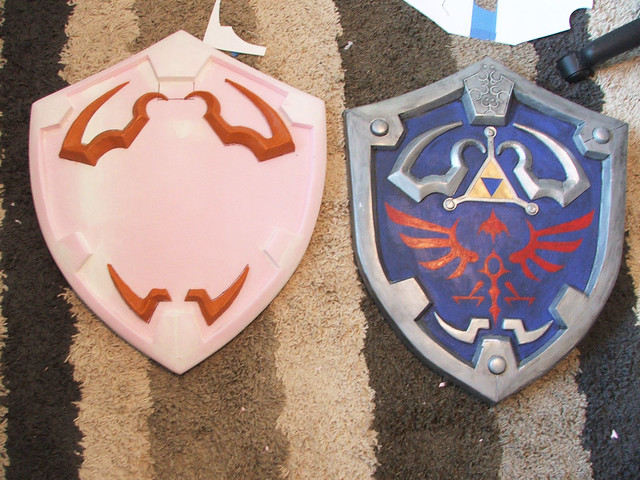
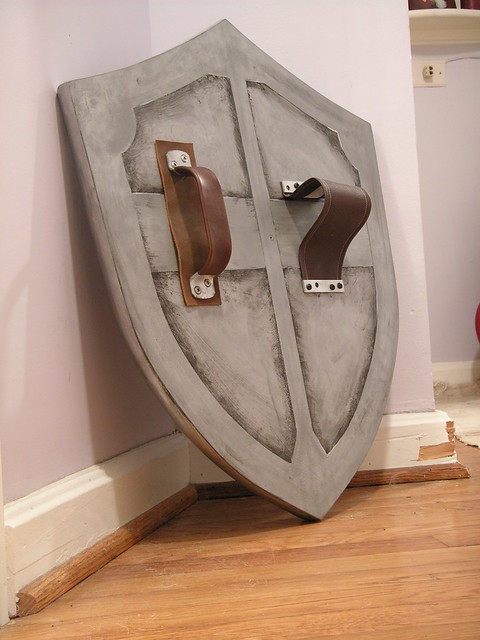
Hylian Shield
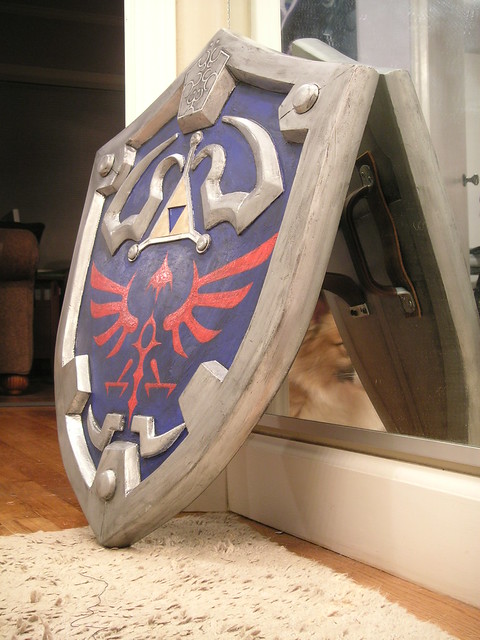
Link’s Hylean shield. Much like the sword I built, this was done in a week and mostly just “eyeballed” with regards to sizing and dimensions. I cleaned up a lot of the edges from “V1″ to V1.1” that you see here.
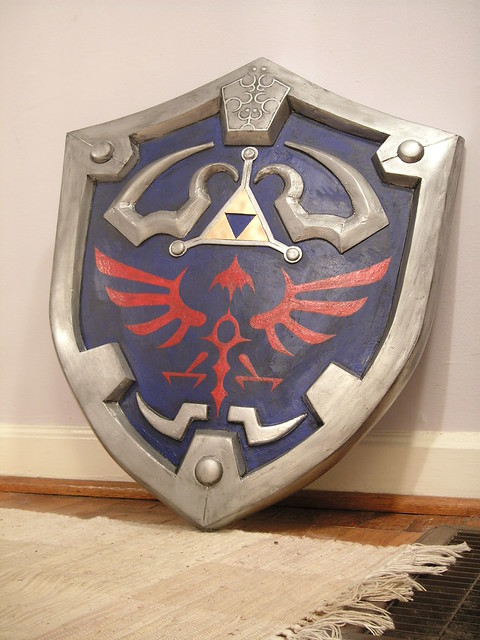
Side Shot. The curve of the shield right now is far too shallow, and the profile is also too thick. This was mostly made with insulation foam and MDF board, then bondo to smooth details. The feligree pieces were also carves from insulation foam, which can’t hold details very well. These will be redone in Apoxie Sculpt for the next version.
The back details were faked in a time crunch. The actual shield has raised edges and rivets in this area. If we’re going for total game accuracy though, the shield model is just flat on the back with a textured map placed on top. That means this is correct!
A full-fledged “V2” rebuild is in the works, since I’ve gone and built a more accurate vector outline of the shield.